
Creating your own garden feature can bring joy and beauty to your outdoor space. With spring around the corner, I’ve been thinking about how much I crave a fresh start in my garden. If you share that same spark for gardening and are looking to enhance your yard, you’re in the right place. This post is crafted for anyone who loves plants but might be limited on space or looking for creative ways to showcase their green thumbs.
In this guide, I’ve gathered 9 planter box plans that are not only beautiful but also functional. These plans cater to those who want to make the most out of small areas while enjoying the pleasure of growing their own flowers, herbs, or vegetables. Whether you’re a seasoned gardener or a curious beginner, you’ll find these ideas practical, inspiring, and totally doable. You’ll walk away with clear plans to create your own DIY planter boxes, turning your outdoor space into a little slice of paradise.
Key Takeaways
– Explore 9 Unique Designs: Discover a variety of planter box plans, including stackable, vertical, and rustic styles, perfect for any garden decor.
– Maximize Small Spaces: These plans are ideal for urban gardeners or anyone with limited outdoor space, allowing you to grow a variety of plants efficiently.
– DIY-Friendly Projects: Each plan includes simple instructions, making them easy for beginners and fun for experienced DIY enthusiasts alike.
– Versatile Gardening Options: From vegetable planter plans to herb gardens, these ideas let you customize your gardening experience according to your preferences.
– Enhance Your Garden’s Aesthetic: These beautiful planter designs not only offer functionality but also elevate the overall design of your garden, making it a welcoming retreat.
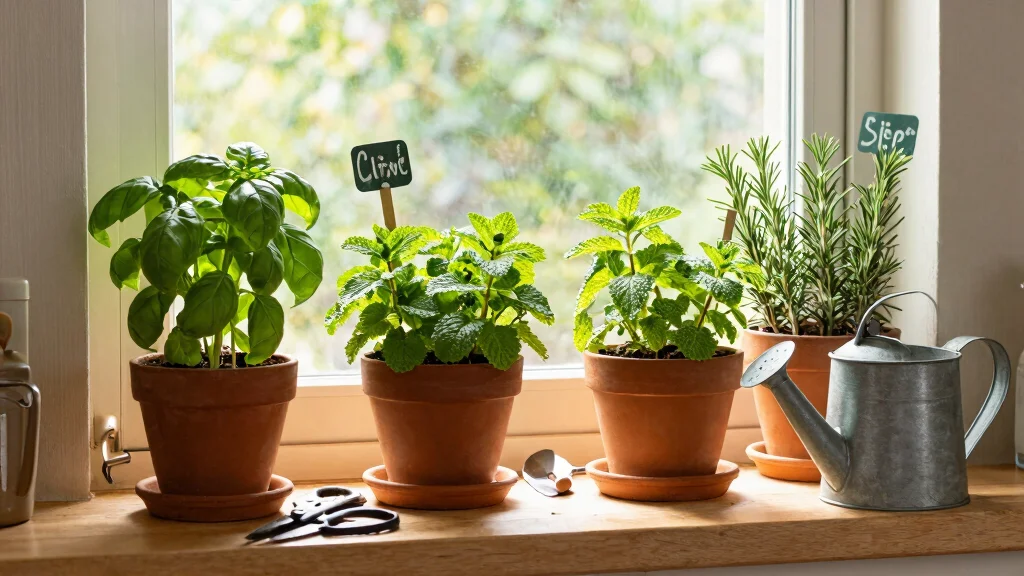
1. Stackable Wooden Planter Boxes

Take your gardening to the next level with stackable wooden planter boxes that maximize space and style. These versatile planters not only look great but also promote healthier plants by allowing better sunlight and drainage. Crafted from rot-resistant wood, they’re designed to endure varying weather conditions while keeping your plants thriving.
Start by arranging your boxes in a configuration that suits your garden layout. This design flexibility lets you create a personalized garden aesthetic. Add a protective wood stain to enhance durability and visual appeal.
Here’s what you’ll need to create these beauties:
– Use untreated cedar or redwood for durability
– Secure with galvanized screws for weather resistance
– Gather a saw, drill, and measuring tape for construction
– Optional: Wood stain or sealer for a polished finish
Arrange plants of varying heights for a stunning display.
Include herbs and small vegetables for added functionality.
Position the boxes to maximize sunlight exposure.
Difficulty Rating & Requirements
Overall Difficulty Rating: Medium
Building planter boxes can be moderately challenging. Most designs require basic woodworking skills, making this suitable for DIY enthusiasts with some experience. If you’re comfortable using power tools and following plans, you’ll likely enjoy the process. Beginners can take on simpler projects, while more intricate designs may suit those with advanced skills.
Time Estimate:
⏱ Estimated time: 4-10 hours
– Planning & Design: 1-2 hours for sketching and selecting materials.
– Material Preparation: 1-3 hours for cutting and sanding wood.
– Assembly: 2-5 hours depending on complexity.
– Finishing Touches: 1-2 hours for painting or sealing.
Skill Requirements:
– Required skills: Basic carpentry, measuring, cutting, and assembly
– Beginner-friendly: Yes, but with caveats. Beginners should start with simpler designs and may benefit from guidance or video tutorials.
– Skills that can be learned: Most woodworking skills can be picked up with practice.
– Skills requiring experience: Advanced joinery or intricate designs may need prior knowledge.
Tools & Materials Needed:
🧰 Essential items checklist:
– Saw (circular or miter) – Required
– Drill – Required
– Screws – Required
– Wood (cedar or untreated pine) – Required
– Measuring tape – Required
– Sandpaper or sander – Required
– Wood stain or paint – Optional for aesthetics
– Wood sealer – Optional for weatherproofing
Step-by-Step Overview:
1. Planning and Design: Spend a couple of hours sketching your planter box design. Choose dimensions based on available space and plant types. (1-2 hours)
2. Material Preparation: Gather materials and cut wood to size based on your design. Sand edges to smooth any rough spots. (1-3 hours)
3. Assembly: Assemble your planter box using screws and a drill. Ensure everything is aligned and secure. (2-5 hours)
4. Finishing Touches: Apply paint or stain if desired. Once dried, apply a wood sealer for durability. (1-2 hours)
Professional vs DIY:
Professional cost: Hiring a professional can range from $200 to $600, depending on the size and materials used. This option guarantees a polished finish but can be pricey.
DIY cost: Building your own planter box can cost between $50 to $150, depending on material choices and complexity. If you have the tools, this is a budget-friendly alternative. Consider hiring help if you’re uncertain about your skills or lack the necessary tools.
This assessment helps you gauge whether you’re ready to tackle the project on your own or if you should seek professional assistance. Happy gardening!
Stackable Wooden Planter Boxes
Editor’s Choice

Olympic WaterGuard 11 oz. Clear Exterior Waterproofing Wood Sealer Spray

THYOI Premium Wooden Planter Box, Storage Box 17″ L x6 W x5.5 H with Cra…
2. Vertical Pallet Garden

Looking for a cost-effective way to garden? A vertical pallet garden is an excellent solution! Reclaimed wooden pallets can be transformed into eco-friendly garden structures that save space and look stylish. By attaching landscape fabric and filling the pallet with soil, you can grow herbs, strawberries, and more in a unique, vertical format.
To create your own, start with a sturdy wooden pallet and clean it up for safety. Landscape fabric will help keep the soil in place while allowing water drainage.
Key steps to build your vertical garden:
– Find a sturdy wooden pallet for stability
– Clean and sand it to remove rough edges
– Attach landscape fabric with a staple gun
– Fill with potting soil and plant your favorites
This garden style adds character to your space and creates a vibrant display. Position it for easy access and maintenance to keep your plants flourishing.
Finally, a green thumb without losing floor space. These planter box plans for a vertical pallet garden let you grow herbs and strawberries up the wall—no fancy gear needed. It’s budget-friendly, easy to customize, and totally doable for small spaces.
Vertical Pallet Garden
Editor’s Choice

Emsco Group City Picker Raised Bed Grow Box – Self Watering and Improv…
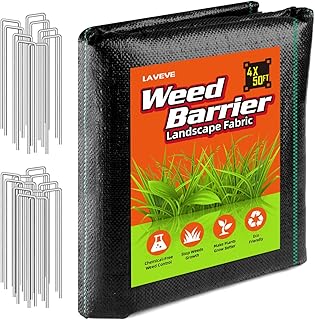
LAVEVE 4FT x 50FT Weed Barrier Landscape Fabric, 3.2oz Premium Heavy Dut…

Burpee, 9 Quarts | Premium Organic Potting Natural Soil Mix Food Ideal f…
3. Tiered Planter Boxes
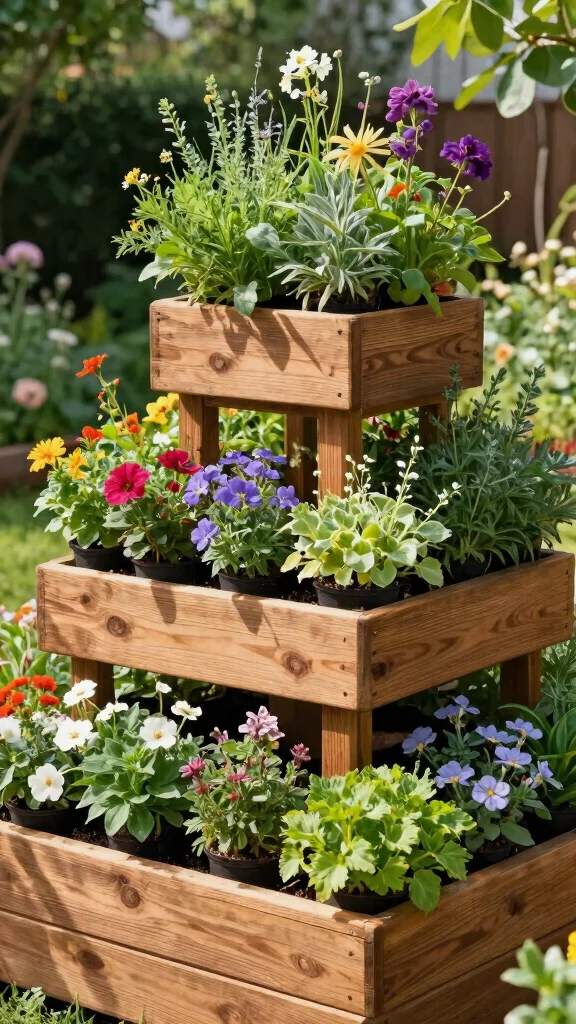
Tiered planter boxes are perfect for small spaces, allowing you to grow multiple plants without sacrificing style. These multi-level designs create a cascading effect that enhances your garden’s aesthetic while optimizing plant care. You can plant flowers, vegetables, or herbs in separate tiers, maximizing sunlight and air circulation.
To make your own tiered planter, choose untreated wood for a natural look or composite materials for durability. Measure the height and width to determine how many tiers you want to create.
Here’s how to get started:
– Use untreated wood for a rustic feel
– Measure and cut boards to your desired size
– Assemble for stability and ease of use
Choose a variety of plants with different growth patterns for interest.
Incorporate a drip tray at the base to manage excess water.
Consider painting or staining the wood to complement your outdoor decor.
Did you know a three-tier planter box can add 60% more planting area in a small balcony? The cascading design lets you grow flowers, herbs, and veggies in a compact footprint—perfect for tiny spaces and easy care with the right planter box plans.
Tiered Planter Boxes
Editor’s Choice

Keter Urban Bloomer 12.7 Gallon Raised Garden Bed and Outdoor Herb Garde…

20 Pack 10 x 10 x 1/8 Inches Square Unfinished Wood Pieces, Thin Plywood…
4. Hanging Planter Boxes

Hanging planter boxes add a delightful touch to your outdoor space without taking up valuable ground area. Ideal for balconies and porches, these planters can be attached to walls or railings, creating a lush vertical garden. You can fill them with flowers, succulents, or small vegetables, making them both decorative and practical.
When creating hanging planter boxes, select durable materials like wood or metal. Ensure all mounting hardware is included for secure attachment.
Steps to create your hanging planters:
– Choose durable materials that resist weather
– Prepare all mounting hardware for installation
– Seal or paint for added protection
Mix and match different plants for visual interest.
Use drip trays to protect surfaces underneath.
Consider a watering system for easy maintenance.
📹 Related Video: Weekend Projects: Building Hanging Planters With French Cleats
Hanging Planter Boxes
Editor’s Choice

TOREVSIOR 5-Tier Vertical Raised Garden Bed, Vertical Garden Planter wit…

AMERLIFE 7×2 Ft Raised Garden Bed, 16 Inch Depth Featuring Legs, Drainag…
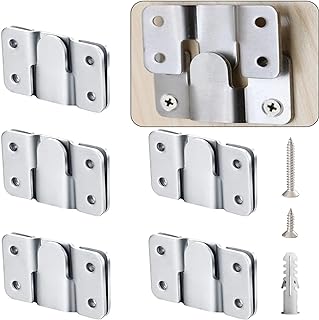
Flush Mount Bracket with Screws 6 Sets Hanging Buckle Kit, Interlocking …
5. Corner Planter Boxes

Maximize your garden’s potential by using corner planter boxes to fill those awkward spaces. Designed to fit snugly in corners, these boxes transform neglected areas into vibrant focal points. You can fill them with hardy plants or colorful flowers to draw attention.
To build corner planter boxes, measure your space accurately to ensure a perfect fit. Use strong materials for longevity and consider drainage holes for healthy plant growth.
Steps to construct your corner planters:
– Measure the space and design for a snug fit
– Use robust materials for durability
– Add drainage holes at the bottom
Choose plants that spill over edges for texture.
Add a trellis for climbing plants to flourish.
Use colorful plants for a dramatic visual impact.
You might also like
Corner Planter Boxes
Editor’s Choice

Miracle-Gro Organic Outdoor Potting Mix – Plant Soil for Outdoor Contain…

3×1.8x1ft Raised Garden Bed Kit for Outdoors, Rustproof PP Raised Plante…

DEWALT Drill Bit Set, 3-Flats Shank,14-Piece, 135 Degree Split Point, fo…
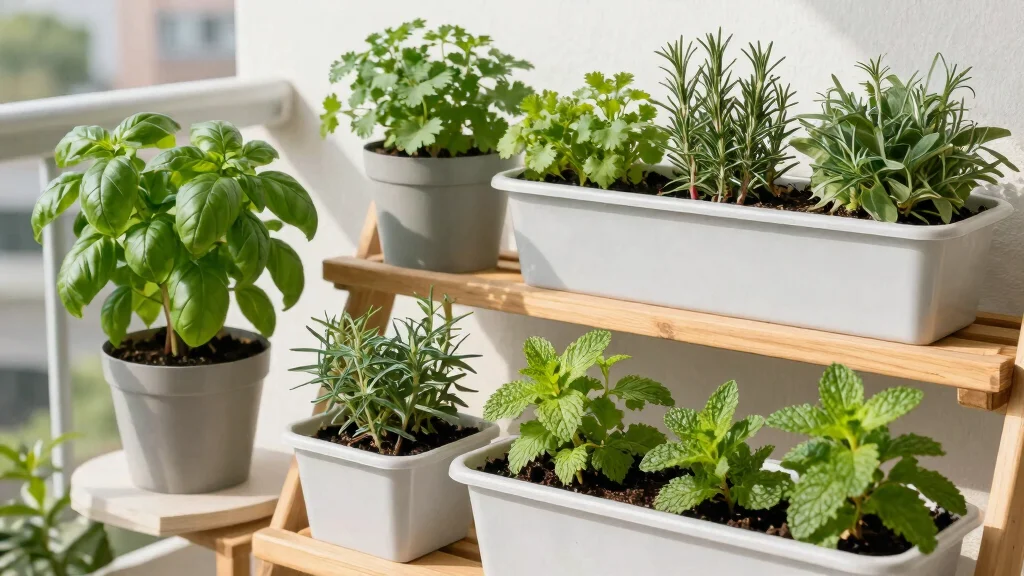
6. Vertical Herb Garden Planters

If you love cooking with fresh herbs, vertical herb garden planters are essential for your kitchen garden. These planters allow easy access to your favorite herbs while creating a stunning visual display. You can build them in tiers, accommodating various herb species in one compact area.
To create a vertical herb garden, consider using cedar wood for durability or recycled materials for a rustic vibe. Ensure the tiers are spaced appropriately for healthy growth.
Here’s how to get started:
– Use cedar wood for longevity
– Measure and cut boards for different herb species
– Space tiers for sunlight exposure
Choose herbs that grow well together like basil, parsley, and chives.
Position your garden near the kitchen for convenience.
Trim herbs regularly to promote healthy growth and use them in your meals.
❝ Turn a tiny corner into a fresh herb haven with a simple vertical herb garden planter. Stack cedar tiers or recycled boxes, and your favorite herbs stay within arm’s reach—no bending, no mess. With practical planter box plans, garden flavor is always at hand. ❞
Vertical Herb Garden Planters
Editor’s Choice

Ahopegarden Indoor Garden Hydroponics Growing System: 10 Pods Plant Germ…

Vertical Strawberry Planter 5 Tier Stackable Tower Herb Planters Stackin…

Maple99 Raised Garden Bed with Legs 48x24x30 – Natural Cedar Wood Elevat…
7. Rustic Barrel Planters

For a charming garden feature, consider using rustic barrel planters. These eye-catching elements provide ample space for plants while adding character to your garden. You can use whole barrels for larger plants or cut them in half for a unique design.
To create rustic barrel planters, find old wooden barrels that are clean and chemical-free. You can adjust their height for your preferred look and ensure proper drainage by drilling holes.
Steps to build your rustic planters:
– Use old wooden barrels for authenticity
– Cut them to your desired height
– Drill drainage holes for healthy plants
Choose plants that thrive in larger containers like tomatoes or shrubs.
Add a mix of soil types for root growth.
Incorporate decorative elements like stones or fairy lights for charm.
Rustic Barrel Planters
Editor’s Choice

Thompson’s WaterSeal Multi-Surface Waterproofer Stain, Clear, 1 Gallon

Adnee 3 Pcs Wooden Whiskey Barrel Planters – 3 Sizes Wooden Bucket Barre…

TCBWFY Auger Drill Bit for Planting 1.6×16.5inch Extended Length Garden …
8. Wall-Mounted Planter Boxes

Wall-mounted planter boxes are an excellent way to utilize vertical space and add character to your outdoor area. These planters attach to walls or fences, creating a stunning green backdrop even in compact spaces. Fill them with trailing flowers, succulents, or small vegetables depending on their size.
To build wall-mounted planters, select lightweight, durable materials that can withstand outdoor conditions. Secure mounting is crucial for safety and longevity.
Key steps to create your wall planters:
– Choose lightweight, durable materials
– Ensure they are securely mounted to the wall
– Use a variety of planter sizes for interest
Group planters of different sizes for a dynamic effect.
Add drip trays to prevent water runoff.
Rotate plants periodically to keep the display fresh and lively.
You Might Also Like


Wall-Mounted Planter Boxes
Editor’s Choice

Arcadia Garden Products PSW U45CT Plastic/Stone/Wood Composite Simplicit…

Adjustable Planter Box Brackets,Enhanced Bottom Support,Universal Outdoo…

All Chic Metal Wall Planter Outdoor Wall Hanging Planter Rustic Wall Mou…
9. Recycled Material Planters

Embrace sustainability by crafting planter boxes from recycled materials. Think creatively! Old wooden crates, tires, or other discarded items can become unique planter boxes. This eco-friendly approach not only helps the environment but also adds an eclectic touch to your garden design.
To create recycled material planters, gather sturdy, weather-resistant materials and clean them thoroughly. A liner can help prevent soil loss and protect the material.
Steps to craft your recycled planters:
– Gather sturdy materials suitable for planting
– Clean and prepare them for planting
– Use a liner to prevent soil loss
Paint or decorate items to match your garden’s style.
Mix various recycled items for a fun, layered look.
Ensure proper drainage to keep your plants healthy.
Recycled Material Planters
Editor’s Choice
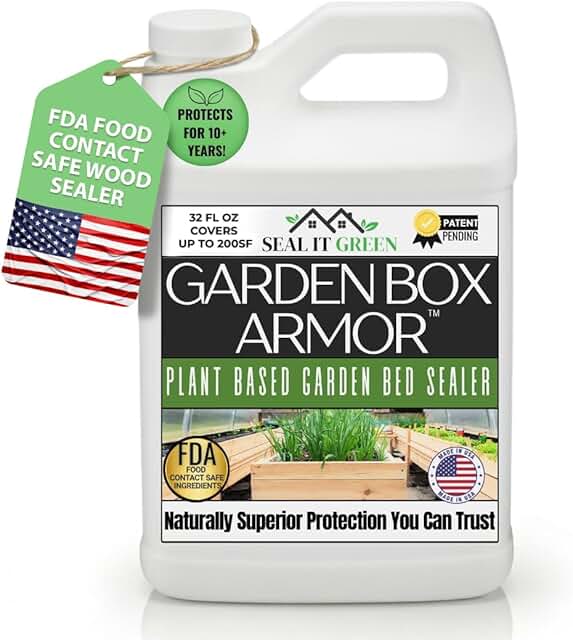
Garden Box Sealer | FDA Food Contact Safe Plant-Based Wood Sealant for R…

63 * 114 inch Raised Garden Bed Liner, Non Woven Fabric Liner for Large …

COOLJOB 3 Pairs Gardening Gloves for Women Men, 100% Recycled Polyester …
Conclusion

Creating a beautiful and functional garden in small spaces is absolutely achievable with the right planter box plans.
These 9 ideas not only help you maximize your outdoor area but also allow you to express your creativity through gardening.
Whether you opt for stackable boxes, vertical gardens, or unique recycled designs, each choice contributes to a thriving garden that enhances your home’s aesthetic.
Start your journey today and watch your small space transform into a lush paradise!
Note: We aim to provide accurate product links, but some may occasionally expire or become unavailable. If this happens, please search directly on Amazon for the product or a suitable alternative.
This post contains Amazon affiliate links, meaning we may earn a small commission if you purchase through our links, at no extra cost to you.
Frequently Asked Questions
What are the best planter box plans for a compact vertical garden in a small space?
For small spaces, look for plans that maximize height without widening the footprint. The 9 planter box plans in this article are designed as vertical planter box plans that fit against walls, fences, or balconies. They’re great for pairing with garden design ideas for tight spaces. Choose a plan that matches your sun exposure and weight limits, and make sure the design includes good drainage and accessible planting depth. If you’re new to DIY planter box projects, start with a simple box and scale up later. With these plans, you can create a beautiful vertical garden in any small space.
How can I build a DIY planter box that doubles as a raised garden bed?
Yes, you can. Start with a deeper box (8–12 inches for shallow veggies; 12–18 inches for most vegetables). Use exterior-grade lumber, line the interior to protect wood, drill drainage holes, and raise the box on feet or casters for airflow. This approach blends DIY planter box construction with practical raised garden beds functionality. Follow these planter box plans to create a versatile garden feature that works as vegetable planter plans and as a decorative element. Tip: use a food-safe sealant on the interior when growing edible plants.
What materials are best for durable outdoor planter boxes and safe for vegetable planting?
Choose rot-resistant woods like cedar or redwood for long life. If you’re on a budget, exterior-grade plywood with a water-based, food-safe sealant works well for the exterior; avoid untreated wood in direct contact with soil if possible. Add a liner to protect the wood from moisture and ensure a breathable bottom. For vegetable planter plans, prioritize interior surfaces that won’t leach chemicals and keep finishes safe for edibles. This keeps your planter box plans both durable and garden-friendly.
What tools do I need to get started with these planter box plans?
Grab a tape measure, carpenter’s square, saw (hand or power), drill with screwdriver bits, wood glue, clamps, sandpaper, screws, and a level. A shop vacuum or brush for cleaning dust helps, too. Optional but handy tools include a pocket-hole jig or a nail gun to speed assembly. This is a classic DIY planter box project, and these steps align with the planter box plans to keep your outdoor project organized and doable.
How can I design a cohesive garden feature using planter box plans?
Start by grouping boxes of different heights and widths along a wall or patio to create a living sculpture. Combine flowering plants with vegetables for rich texture, which ties into garden design ideas. Use a consistent material and color palette so the boxes feel like one feature rather than separate pieces. Include a slim trellis for climbers and plan around vegetable planter plans to keep the whole setup looking intentional and stylish. It’s a smart way to blend outdoor gardening projects with a polished landscape.
Related Topics
planter box plans
vertical gardening
DIY planter box
small space gardening
raised garden beds
outdoor decor
vegetable planter plans
easy gardening projects
urban gardening
beginner friendly
functional garden features
garden design ideas