Starting seeds indoors has me excited about the potential of lush plants filling my home. There’s something magical about watching tiny seeds sprout into beautiful greenery, bringing life and color into your space. It can feel overwhelming, especially for urban gardeners with limited outdoor space. But don’t worry, you’re not alone in this journey of indoor gardening. Many people are searching for ways to grow vibrant plants from scratch, and that’s exactly why I’ve put this post together.
If you’re someone who loves nurturing plants but struggles with the seed starting process, this guide is for you. Whether you’re a seasoned gardener or just dipping your toes into the world of plant care, these tips will help you succeed. You’ll discover practical strategies for indoor seed starting that ensure your seedlings grow healthy and strong. With these insights, you’ll be well on your way to creating an indoor garden that flourishes beautifully.
In this post, you’ll find eight essential tips that are straightforward, easy to follow, and perfect for anyone looking to enhance their indoor gardening skills. From choosing the right seeds to caring for your seedlings, I’ve crafted this guide to empower you in growing your own plants from scratch. Let’s dive in and unlock the secrets to successful seed starting indoors!
Key Takeaways
– Choose the Right Seeds: Select seeds that are suitable for indoor gardening and suited to your environment to ensure successful germination.
– Use Quality Seed Starting Mix: A good seed starting mix provides the right drainage and nutrients, promoting strong seedling growth.
– Provide Proper Lighting: Adequate light is crucial for seedlings. Use grow lights or place seedlings in a sunny window to ensure they thrive.
– Water Wisely: Monitor moisture levels carefully. Overwatering can lead to root rot, while underwatering can stress your plants.
– Transplant When Ready: Timing is key. Transplant your seedlings to larger pots once they develop true leaves to support their growth.
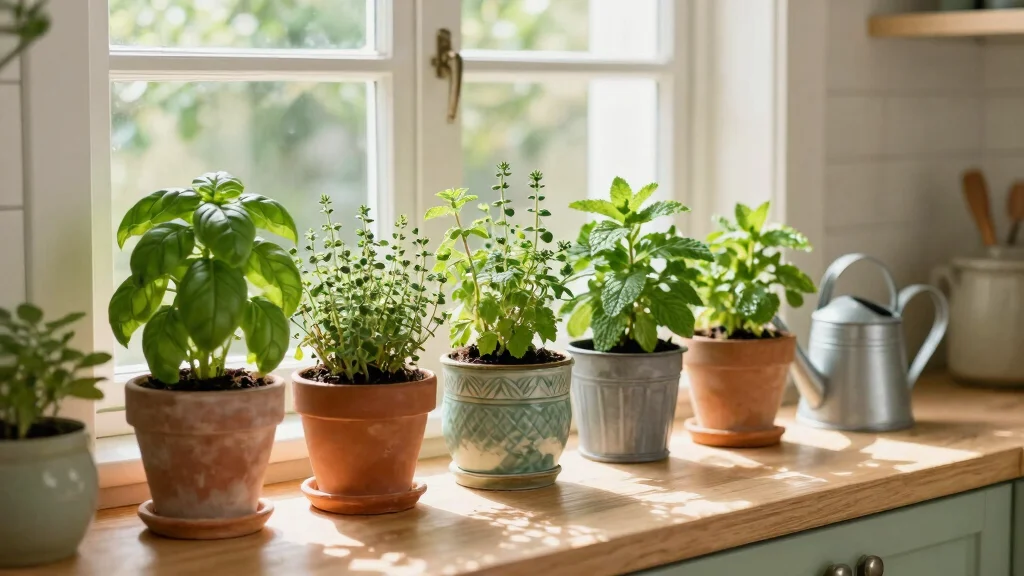
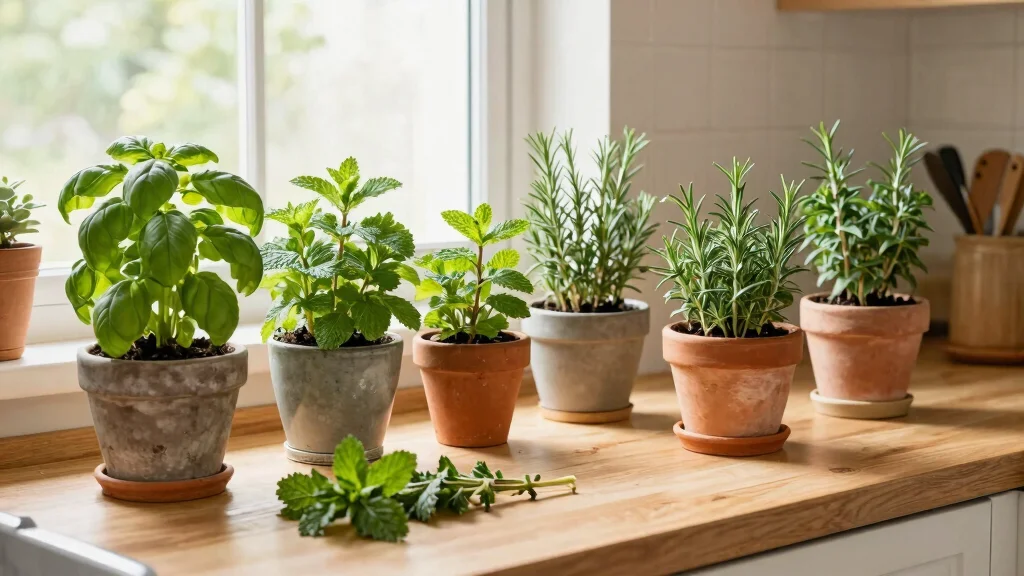
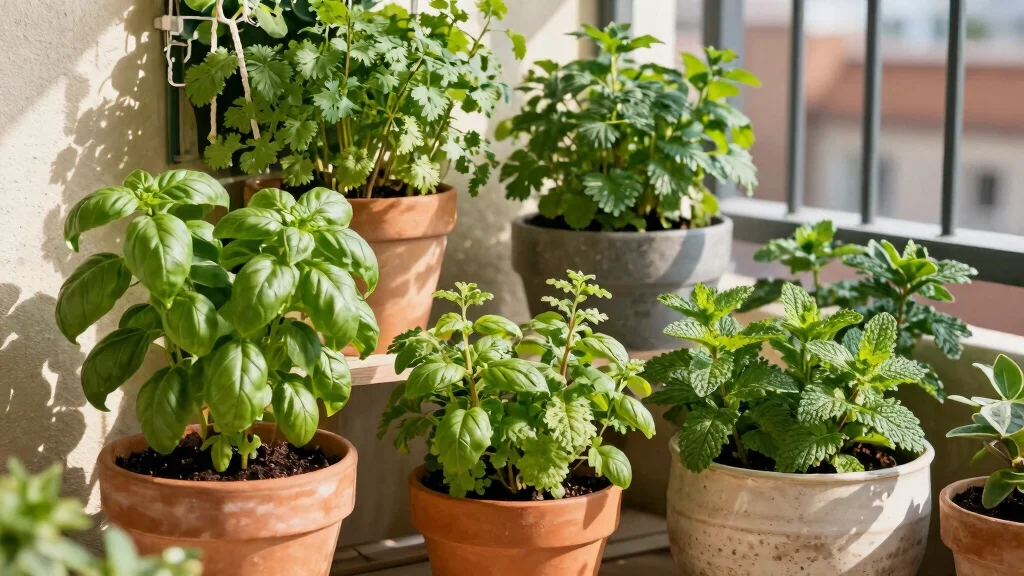
1. Choose the Right Seeds

Finding the right seeds is crucial for your indoor gardening success. Selecting seeds that thrive in your indoor conditions can make all the difference. Start with easy-to-grow options like basil, cilantro, or crisp lettuce to kick off your gardening adventure. Don’t forget to refer to the seed packet for specific needs, such as light and temperature requirements.
Consider your indoor lighting situation when choosing seeds. If natural light is limited, look for seeds that tolerate low light, or consider using a grow light to support their growth.
Key steps for selecting seeds:
– Choose non-GMO or organic seeds for healthier plants.
– Explore heirloom varieties for unique flavors.
– Diversify your selection for a vibrant indoor garden.
This careful selection process enhances your gardening experience and increases your chances of a bountiful harvest. Enjoy planting!
Choose the Right Seeds
Editor’s Choice

Aokrean Plant Grow Light, 48 LEDs Full Spectrum Grow Lights for Indoor P…

Halatool 4 Pack Seed Starter Tray with 50 PCS Peat Pellets, 48 Cells Bla…
2. Use Quality Seed Starting Mix

The soil you choose is vital for the healthy growth of your seedlings. A quality seed starting mix should be light and airy, ensuring excellent drainage for strong root establishment. Regular garden soil can be too compact and may introduce pests.
Select mixes that include ingredients like peat moss, vermiculate, or coconut coir. These materials not only retain moisture but also promote air circulation, which is essential for seedlings.
Essential tips for choosing soil:
– Pre-moisten your seed starting mix before planting for better moisture consistency.
– Avoid packing the soil too tightly; a gentle touch is best.
– Consider adding a slow-release organic fertilizer for extra nutrients.
By investing in a quality mix, you provide the best environment for your seeds to thrive and develop into healthy plants.
Fun fact: seed starting indoors with a light, airy mix reduces damping-off risk by up to 40%, and sturdy transplants appear in just 2–3 weeks. Choose a mix with peat moss, vermiculite, or coconut coir for moisture and air circulation.
How To Choose The Right Seeds
When starting your seed starting indoors journey, selecting the right seeds is crucial. Different plants have varying needs, so understanding these factors can be the difference between a garden that flourishes and one that withers.
1. Consider Your Space
Think about the space you have for your indoor garden. If you have limited room, opt for compact varieties like dwarf tomatoes or herbs. For larger spaces, you can experiment with taller plants. Knowing your space helps you choose seeds that will thrive without overcrowding.
2. Understand the Climate
Indoor environments can vary in temperature and humidity. Check the recommended climate for each seed type. Some seeds prefer warm, humid conditions, while others thrive in cooler, drier spaces. Choose seeds that will match your indoor climate for the best results.
3. Check the Germination Time
Different seeds have different germination times. Fast-germinating seeds like radishes can sprout within a week, while others like peppers may take a month. If you’re eager to see results, pick seeds that germinate quickly to keep your motivation high.
4. Assess Your Growing Goals
Think about what you want to achieve in your indoor garden. Are you looking for beautiful flowers, fresh herbs, or vegetables? Your goals should guide your seed choices. If you’re a beginner, starting with easy-to-grow options like basil or lettuce can build your confidence.
5. Consider Seed Quality
Always choose high-quality seeds from reputable sources. Look for organic or heirloom varieties if you prefer sustainable options. Quality seeds have better germination rates and can lead to healthier plants. Check for expiration dates, and avoid seeds that appear damaged or old.
6. Experiment with Different Varieties
Don’t be afraid to try new types of plants! Mixing different varieties can make your indoor garden more interesting. You can grow flowers alongside herbs or vegetables for a diverse garden experience. Just ensure that their growing requirements align.
Pro Tip: Create a planting calendar to track when to sow seeds based on their germination time and your indoor gardening goals. This helps you stay organized and ensures you’re not overwhelmed with plants sprouting all at once! 🌱
Use Quality Seed Starting Mix
Editor’s Choice

Espoma Organic Seed Starter Premium Potting Soil Mix – All Natural & Org…

ZeeDix 2 Pcs Coco Coir Brick for Plants- 100% Organic Coconut Coir for G…

Sukh 14.6OZ Vermiculite – Organic Vermiculite for Gardening Plants Fine …
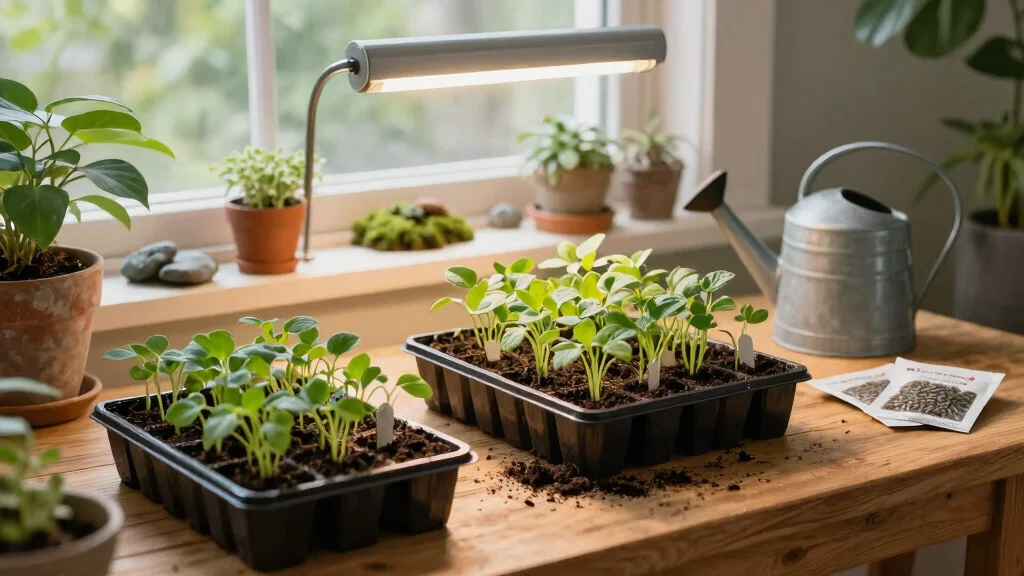
3. Provide Proper Lighting

Proper lighting is key to successful seed starting. Insufficient light can cause seedlings to stretch and become leggy. Aim for 12 to 16 hours of light each day for robust growth. If sunlight is scarce, using grow lights can make a significant difference.
LED grow lights are energy-efficient and provide the right light spectrum for plant growth. Position them 2-4 inches above your seedlings, adjusting as they grow to ensure optimal light exposure.
Helpful lighting tips:
– Rotate your trays regularly for even light distribution.
– Watch for signs of light deficiency, like pale leaves.
– Turn off grow lights at night for natural day/night cycles.
Providing adequate lighting sets the foundation for strong, healthy seedlings that can thrive.
Fun fact: Seed starting indoors benefits from 12 to 16 hours of light each day, not too little or they get leggy. A compact LED setup just 2–4 inches above sprouts can make a dramatic difference in sturdy, healthy growth. Tip: adjust height as they grow for perfect exposure.
Provide Proper Lighting
Editor’s Choice

GooingTop LED Grow Light,6000K Full Spectrum Clip Plant Growing Lamp wit…
4. Water Wisely

Watering your seedlings correctly is essential for their health. Striking the right balance is crucial—too little water can cause wilting, while too much can lead to root rot. Start with light misting to keep the soil moist without overwatering.
Using a spray bottle or a gentle watering can with a narrow spout can help you control the amount of water. Always check the top inch of soil; if it feels dry, it’s time to water.
Key watering tips:
– Water in the early morning for better evaporation.
– Use room temperature water to avoid shocking seedlings.
– Ensure drainage holes are clear to prevent waterlogging.
Mastering the watering process helps your seedlings flourish into healthy, mature plants.
You might also like
Water Wisely
Editor’s Choice

Plastic Spray Bottles for plant – 10oz/300ml – Mist Stream – No Clog No …

Fasmov 1-Gallon Plastic Watering Can with Comfortable Handle, Garden Wat…

XLUX Long Probe Deep Use Soil Moisture Meter, Water Monitor Indicator Se…
5. Monitor Temperature and Humidity

Temperature and humidity are vital for seed germination and growth. Most seeds prefer temperatures between 65°F to 75°F. If your space is cooler, consider using a heat mat to maintain warmth.
Humidity also plays a role in seedling development. Cover your seed trays with a plastic dome or wrap to create a mini greenhouse effect, removing it once seedlings emerge to prevent mold.
Important tips for monitoring conditions:
– Use a thermometer for accurate readings.
– Adjust the room temperature with heaters or fans if needed.
– Ensure good air circulation to avoid excessive humidity.
By monitoring temperature and humidity closely, you create ideal conditions for your seeds to germinate and thrive.
📹 Related Video: Proper temperature and humidity for your seedlings. What is VPD?
Monitor Temperature and Humidity
Editor’s Choice

VIVOSUN Durable Waterproof Seedling Heat Mat 10″ x 20.75″ UL & MET-Certi…

YAMRON 4-in-1 Soil Moisture Meter, Digital Plant Temperature/Soil Moistu…

Gardzen 5-Set Seed Starter Tray Kits, Durable Plant Germination Trays wi…
6. Thin Your Seedlings

Thinning your seedlings is essential once they develop a few true leaves. When seedlings are too crowded, they compete for nutrients, light, and space, resulting in weaker plants. Thinning ensures that the strongest seedlings have ample room to grow.
Use scissors to snip weaker seedlings at soil level, rather than pulling them out, to avoid disturbing neighboring roots. Aim to keep one healthy seedling per cell.
Thinning tips:
– Thin in the morning when seedlings are hydrated.
– If unsure, remove the weakest or smallest seedlings.
– Be gentle to protect surrounding plants.
Thinning at the right time helps promote healthy growth, allowing your plants to reach their full potential.
Thin Your Seedlings
Editor’s Choice

VIVOSUN 6.5 Inch Gardening Scissors Hand Pruner Pruning Shear with Strai…

10 Plant Growing Trays (No Drain Holes) – 20″ x 10″ – Perfect Garden See…
7. Transplant When Ready
Your seedlings will eventually outgrow their trays, making transplanting a crucial step for their growth. Choose pots that are 3 to 4 inches deep for most seedlings to ensure they have enough space for root expansion.
Before moving them, harden off your seedlings by gradually exposing them to outdoor conditions if they will be planted outside later. This acclimation reduces transplant shock.
Key transplanting tips:
– Water seedlings a day before transplanting for easier handling.
– Handle seedlings by the leaves to avoid damage.
– Use fresh, quality potting mix in new pots for added nutrients.
Successfully transplanting your seedlings sets them up for robust growth and a fruitful indoor garden.
You Might Also Like
Transplant When Ready
Editor’s Choice

Nursery Pots 100 PCS 4 Inch Plant Pots with 100 Labels, Planting Pot for…
8. Keep Learning and Experimenting

Indoor gardening is a journey filled with learning opportunities. Each seed starting session teaches you something new, whether it’s recognizing which varieties thrive best or discovering innovative growing techniques. Don’t shy away from experimenting with different seeds and methods.
Engage with gardening communities online or locally to share experiences and gain insights. Keeping a journal can help you track your progress and note what works well.
Tips for ongoing learning:
– Experiment with unusual or heirloom varieties for excitement.
– Attend workshops to expand your knowledge.
– Celebrate successes and learn from challenges.
Embrace the adventure of indoor gardening, knowing every experience contributes to your growth as a gardener.
Keep seed starting indoors as a daily experiment—each batch teaches what thrives and what doesn’t. Track varieties, tweak tips, and share notes with local gardening groups. Small, practical experiments turn growing from indoors into confident, flavorful harvests for urban gardeners.
Keep Learning and Experimenting
Editor’s Choice
GooingTop LED Grow Light,6000K Full Spectrum Clip Plant Growing Lamp wit…

Burpee SuperSeed Starting Tray | 16 XL Cell | Reusable & Dishwasher Safe…

Garden Planner and Log Book: Monthly Gardening Organizer Notebook for Av…
Conclusion

Embarking on the journey of seed starting indoors opens up a world of possibilities for urban gardeners. With the right tools, techniques, and a little patience, you can cultivate a lush indoor garden filled with beautiful and healthy plants. Remember that every gardener’s path is unique, so don’t be afraid to explore different methods and learn from your experiences.
By following these tips, you’re well on your way to not just growing plants, but nurturing a vibrant indoor oasis that reflects your personal touch. Happy gardening!
Note: We aim to provide accurate product links, but some may occasionally expire or become unavailable. If this happens, please search directly on Amazon for the product or a suitable alternative.
This post contains Amazon affiliate links, meaning we may earn a small commission if you purchase through our links, at no extra cost to you.
Frequently Asked Questions
What essential supplies do I need for seed starting indoors in an urban gardening setup?
Getting started with seed starting indoors is easier when you have the basics. Here’s a practical checklist for urban gardeners:
– Seed starting trays or small pots with drainage holes
– High-quality seed starting mix or peat pellets
– A clear humidity dome or lid to retain moisture
– A spray bottle or gentle watering can for even dampening
– A reliable light source (bright sunny window or indoor gardening compatible grow lights) and a timer
– A thermometer and hygrometer to monitor temperature and humidity for healthy seed germination
– Labels and a marker to track varieties
– A small fan to improve air circulation and prevent damping-off
– Optional: diluted, half-strength fertilizer for seedlings after they develop true leaves
Tips: keep seeds in the 65-75°F (18-24°C) range and provide bright light as soon as germination occurs to promote sturdy indoor plant health.
How do I choose the right seeds and containers for seed germination indoors?
Start with varieties that germinate reliably indoors and suit your space: leafy greens (lettuce, spinach), herbs (basil, cilantro), and compact vegetables. For containers, opt for 2-3 inch (5-7 cm) depth for small seeds and 4-6 inch (10-15 cm) for larger ones, all with drainage holes. Use a clean seed starting mix and label everything clearly. Keep containers on a tray to catch excess water and monitor seed germination conditions (temperature and moisture). When seedlings show their first true leaves, transplant to bigger pots to support growing seedlings and healthy indoor plant health.
What’s the best lighting and temperature setup to maximize seed germination indoors?
Most seeds germinate best at about 65-75°F (18-24°C). Provide bright light with a full-spectrum source if you don’t have a sunny window, and run lights for 12-16 hours a day to boost seed germination and prevent leggy seedlings. Place lights 2-4 inches above the tops of the sprouts and rotate pots for even growth. If you use a window, protect against cold drafts and maintain steady temperatures for optimal indoor plant health. After germination, continue strong light to sustain healthy seedlings.
What are common seed starting indoors mistakes and how can I avoid them?
Common mistakes include overwatering (messy roots), using heavy or non-sterile soil, and too little light leading to stretched, weak plants. Other pitfalls are overcrowding, not labeling varieties, and skipping thinning or potting up. To prevent these, water from the bottom when possible, choose a well-draining seed starting mix, provide ample light, space seedlings apart, clearly label every variety, and thin mast enough so each plant has room to grow. With attention to these, your indoor gardening journey stays on track and supports strong indoor plant health.
How do I care for seedlings after germination to ensure strong indoor plant health?
After germination, keep soil consistently moist but not soggy and start a light feeding schedule with a half-strength fertilizer once true leaves appear. Thin crowded seedlings to one per pot and transplant to bigger containers as they grow. Maintain good air circulation with a small fan, and keep plants on a reliable light schedule to prevent legginess. When you’re ready to move some plants outdoors, start hardening off gradually. This approach supports healthy indoor plant health and successful growing seedlings.
Related Topics
seed starting indoors
indoor gardening
urban gardening
growing seedlings
plant care tips
seed germination
beginner friendly
easy gardening
indoor plant health
container gardening
sustainable practices
seasonal planting